
Keeping your food and drinks icy cold during a multi-day trip is critical, especially if you are on the trail and off the grid with no nearby resources for additional ice.
We determined that having an additional full-size cooler on our trips was needed to support our four-person family adventures. We considered a variety of cooler options, including the bear proof (and heavy) Yeti to the electric powered ARB fridge/freezer to the basic Coleman.
The obvious and most critical feature of a cooler, is the number of cold storage days. Of course, the number of cold storage days can be a big variable, beginning with how your cooler was packed with ice and food (food on bottom, ice on top). We also took into consideration quality, weight, price, and ability to fend off bears.
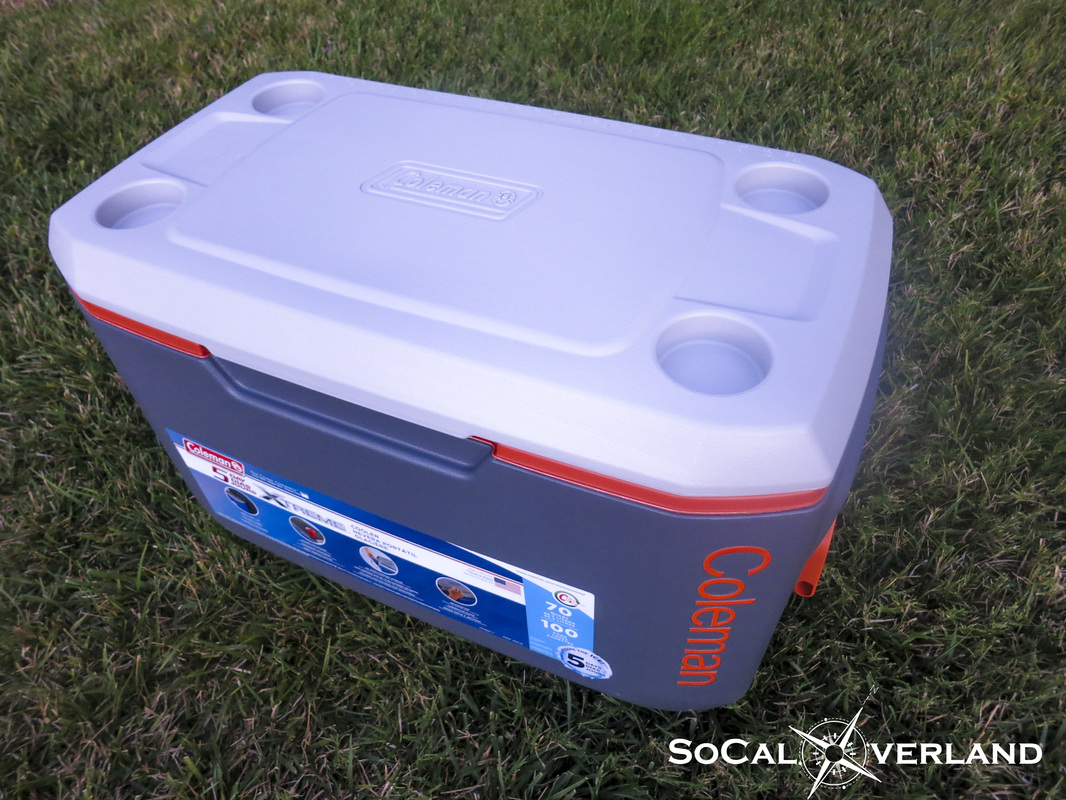
We decided on the Coleman Xtreme 5 Day cooler. Obvious visual features are the lid-top cup holders, which for us have never been a critical feature, but nice to have. Positive features include five days of claimed cold storage, light weight, and reasonable price. The Coleman is also made in the USA.
We determined that having an additional full-size cooler on our trips was needed to support our four-person family adventures. We considered a variety of cooler options, including the bear proof (and heavy) Yeti to the electric powered ARB fridge/freezer to the basic Coleman.
The obvious and most critical feature of a cooler, is the number of cold storage days. Of course, the number of cold storage days can be a big variable, beginning with how your cooler was packed with ice and food (food on bottom, ice on top). We also took into consideration quality, weight, price, and ability to fend off bears.
We decided on the Coleman Xtreme 5 Day cooler. Obvious visual features are the lid-top cup holders, which for us have never been a critical feature, but nice to have. Positive features include five days of claimed cold storage, light weight, and reasonable price. The Coleman is also made in the USA.
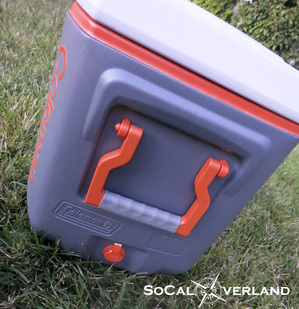
Handles provide for the only means of moving this cooler from one spot to another, however, the Yeti and ARB also come sans wheels. Coolers can get heavy quick, requiring a strong back if carried even any short distance.
The Coleman Xtreme 5 carrying handles feel relatively sturdy and are easy to grip and hold on to. The rubberized handles provide for some comfort during carrying, they do flex slightly, though this seems normal and not a concern for failure.
As with all coolers, having a longer distance to man haul your cooler can be made much easier by convincing a friend to do the heavy lifting.
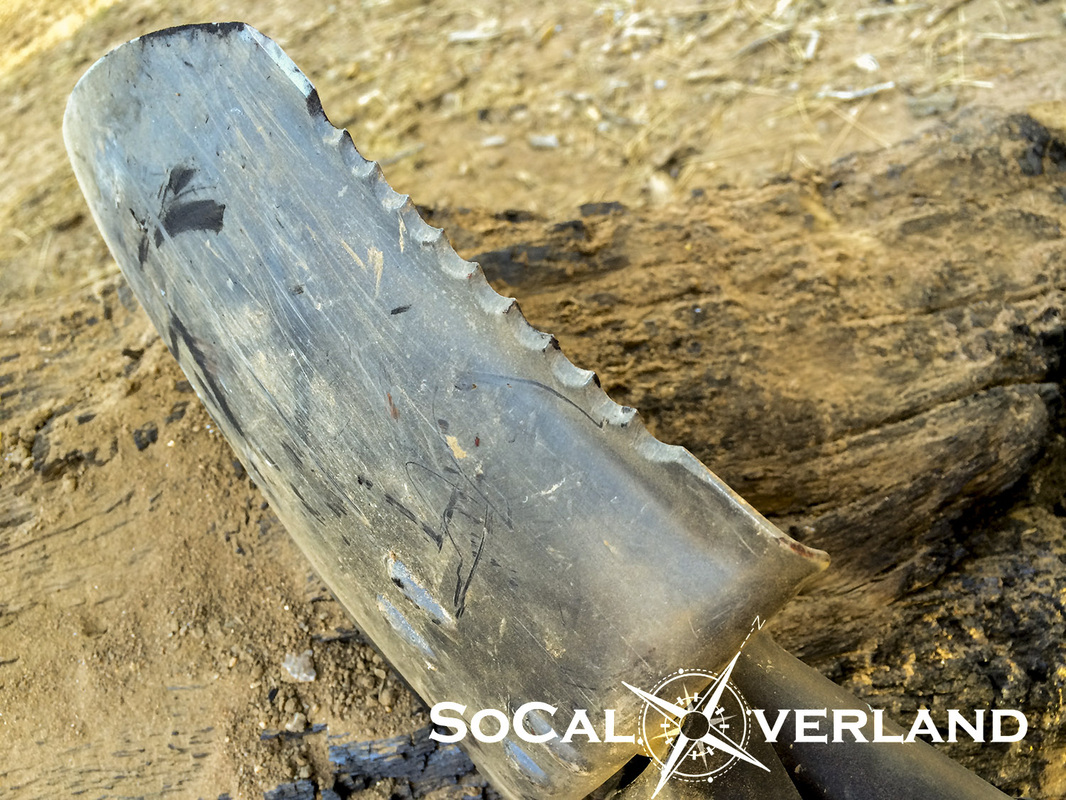
This Coleman Xtreme 5 cooler has a 70 quart capacity, equivalent to 100 cans of your favorite 12 oz. beverage. The insulated body provides for relatively thin side walls, which helps to maximize the "capacity to mass ratio".
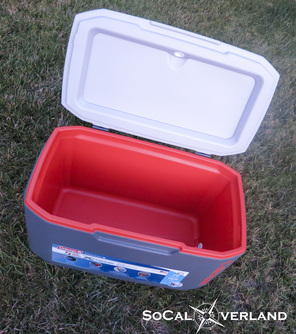
The lid has no latch, which means a quicker and easier process for getting in and out of the cooler. Just "open" and "close". One of our concerns was for the lid remaining completely closed while on the trail or knowing that the lid would remain fully shut while at camp. However, the lid perimeter has a large rim that pushes down into a deep groove of the cooler body ensuring an airtight closure.
And of course, without a lid latch, this cooler could easily fall victim to a bear attack.
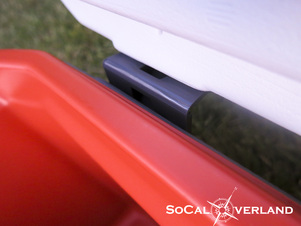
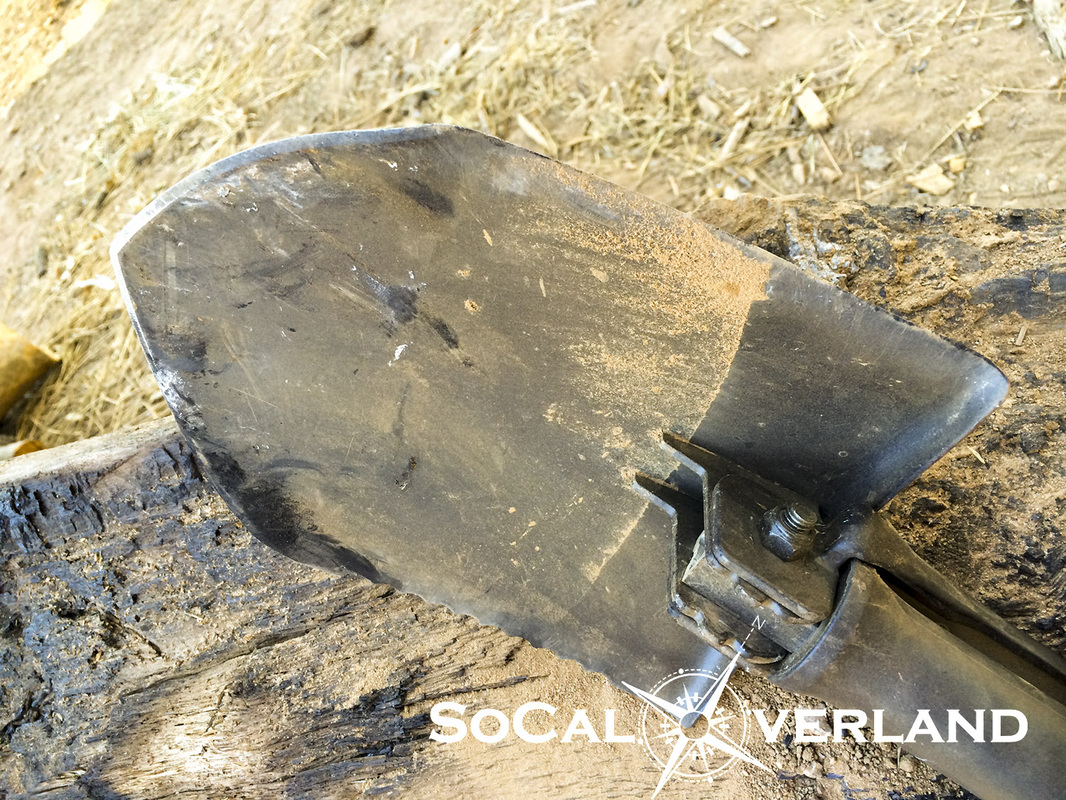
Keep in mind that this Coleman was the lowest priced option of the coolers we were considering. One potential weak spot could be the plastic hinges, which are not even really hinges. The plastic pieces that hold the lid to the cooler body merely bend with every opening and closing.
Even being brand new...as the grey plastic "hinges" flexed in the lid open position, a white stress line appeared in the plastic along the apex of the bend.
Even being brand new...as the grey plastic "hinges" flexed in the lid open position, a white stress line appeared in the plastic along the apex of the bend.
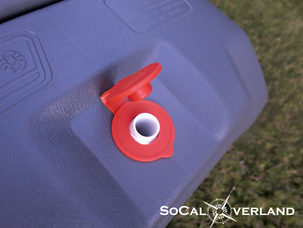
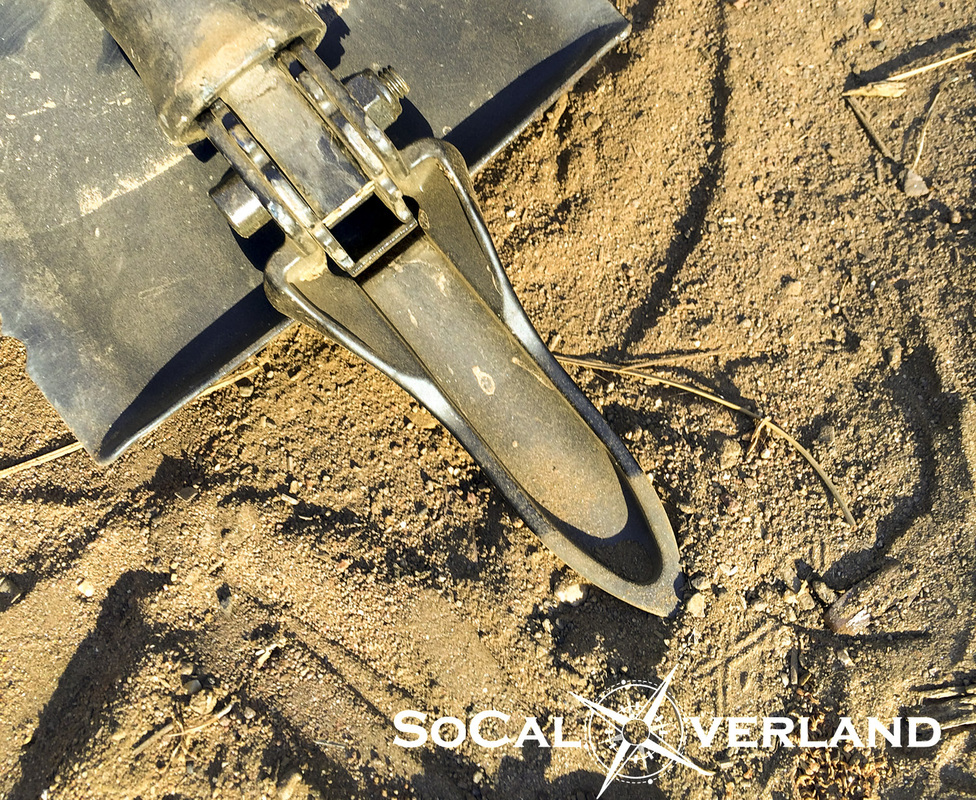
Continuing the theme of "using your imagination" that these plastic pieces are really hinges, the drain cap is a one piece design that includes a hinge, or well, just a length of plastic bent in half.
In theme with the ingenious design of the hinge, the drain cap is well, no more than just a cap. What would be more assuring? Answer: A cap that screws on for 100% assurance.
Despite a non-screw-on cap, the convenient push on cap fits snugly with relatively good assurance that water would not likely be escaping from the depths of the cooler cavity and flooding your vehicle.
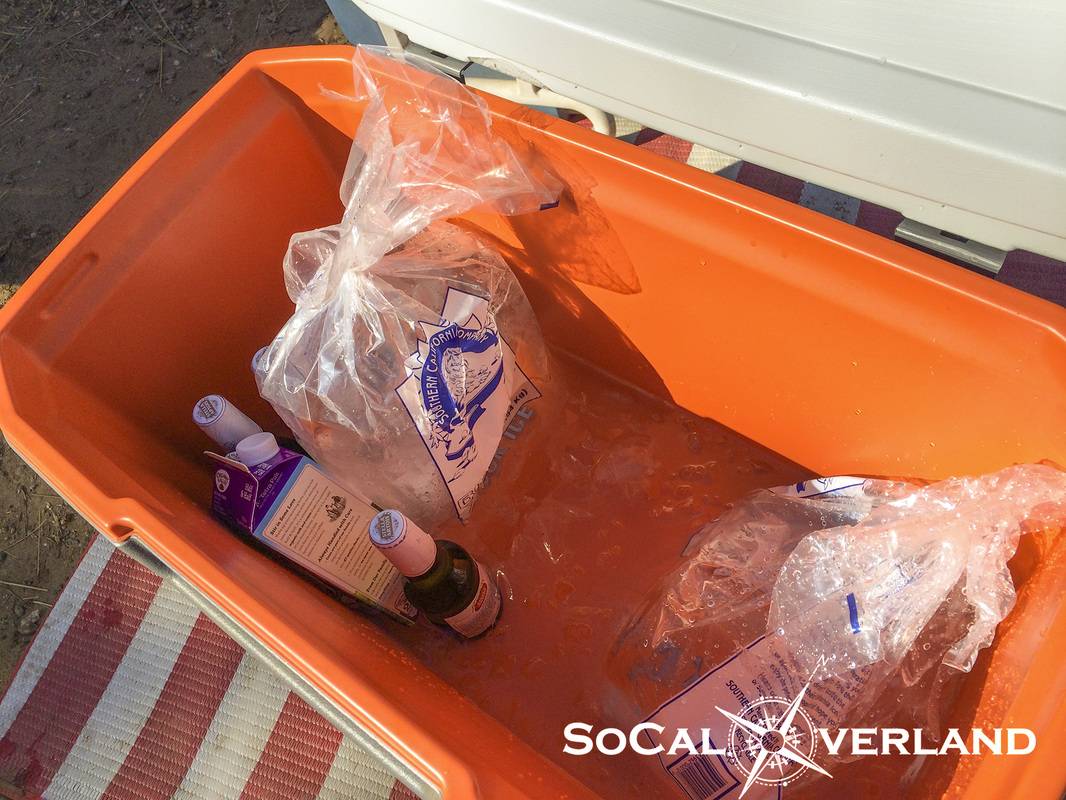
During the Labor Day weekend, beach temperatures climbed into the 90 degree range, while the deserts were well into the 100's. We split the difference and camped in the Laguna Mountains at 6,000 feet elevation.
Even at this higher elevation and under the pine trees, the day time temperature was well into the 90 degree range, which provided for a good test of our new Coleman Xtreme 5 cooler.
Even at this higher elevation and under the pine trees, the day time temperature was well into the 90 degree range, which provided for a good test of our new Coleman Xtreme 5 cooler.
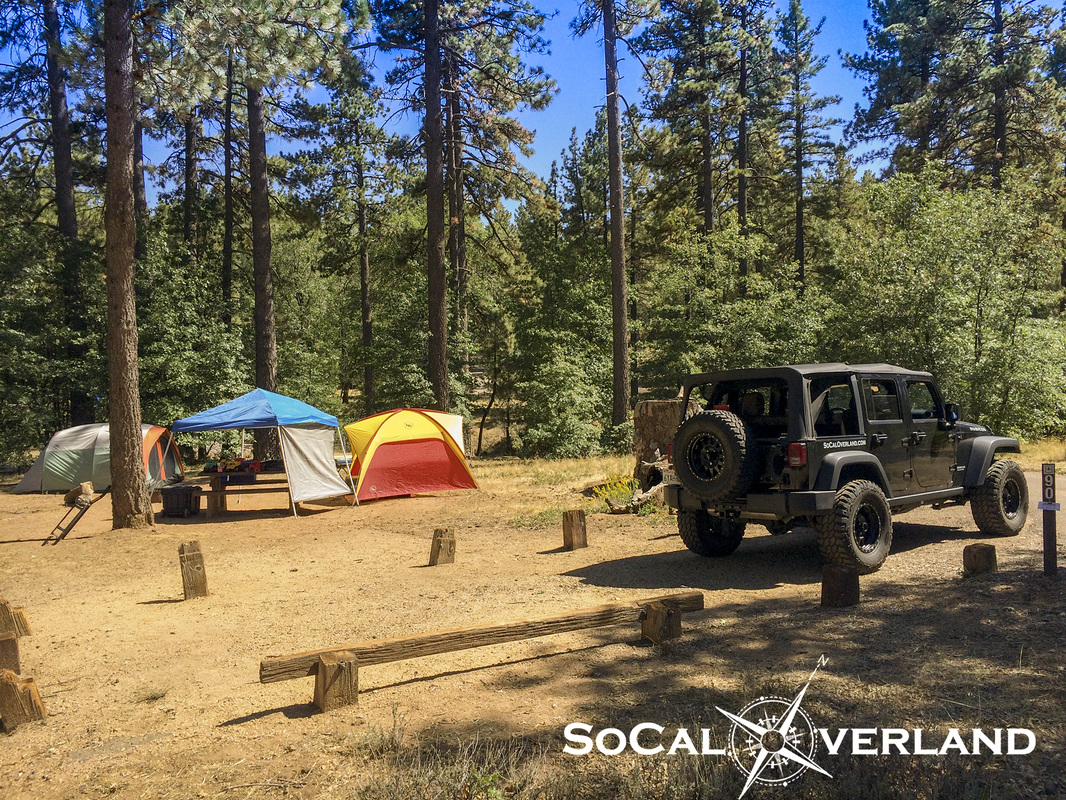
Alongside the Xtreme 5 cooler is our older blue Coleman cooler with a slightly smaller capacity (60 quart, 81 can capacity).
Our older Coleman has served us well, including being attacked by a bear in the high Sierra mountains. We lost food during that nighttime encounter, including our chocolate for s'mores, however, the cooler has continued to live on with residual punctures from the bears teeth in the cooler lid.
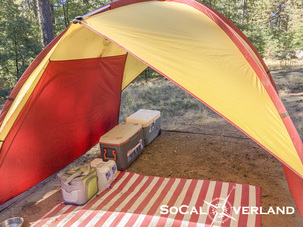
And while our Big Agnes Three Forks shelter provides for cooling shade at the beach, it also works well for shading our coolers at camp. Even under the cover of the shade, the heat was fierce and a good test for both coolers.
Our older Coleman has served us well, including being attacked by a bear in the high Sierra mountains. We lost food during that nighttime encounter, including our chocolate for s'mores, however, the cooler has continued to live on with residual punctures from the bears teeth in the cooler lid.
And while our Big Agnes Three Forks shelter provides for cooling shade at the beach, it also works well for shading our coolers at camp. Even under the cover of the shade, the heat was fierce and a good test for both coolers.
By day two of our four day adventure, the Coleman Xtreme 5 Day cooler remained icy cold and showed no signs of melted ice in the 95 degree heat.
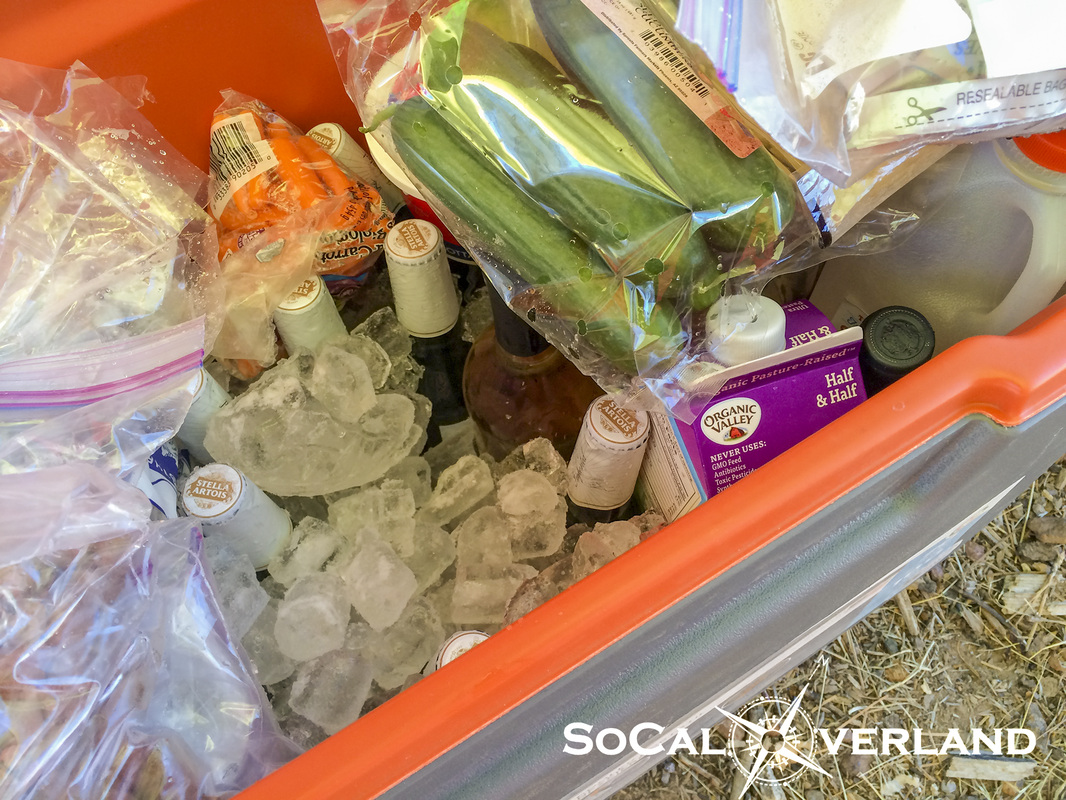
After four days of enduring heat, the Coleman Xtreme 5 Day cooler had shown the expected signs of our cube ice melting, however, the large block ice was 75% remaining, and with that, we could have easily gone a fifth day.
Overall, we are satisfied with our Coleman Xtreme 5 day cooler.
We can recommended the Xtreme 5 cooler for:
1. Keeping food and drinks icy cold for four days in 95 degree heat, with ability to endure at least five days
2. Light weight
3. Thin side walls to maximize capacity
4. Lid that seals tightly
5. Convenience of easy access lid open-closure (no latches to unlatch or re-latch)
6. Price
Potential things to consider with the Xtreme 5 cooler:
1. Hinges that attach lid and drain cap could have a questionable life expectancy
2. Drain cap is just that and does not screw on into place (though, the cap does fit with confidence)
3. No tray to prevent delicate foods from falling into the depths of the cooler
4. No latch to ensure lid remains closed (again, the lid does close with confidence)
5. Not bear proof
What is your cooler of choice and why?


 RSS Feed